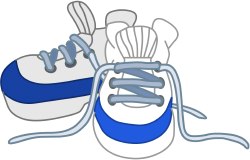
Tying Shoes -- Preschool & Kindergarten
Tying Shoes

Poems/Songs
Tepee Tying
Use different colored shoe laces so that you can cue the child on which side they should be working with at a given step. In the poem below each line corresponds to one step of the tying process.
Build a tepee
Come inside
Close it tight so we can hide
Over the mountain
And around we go
Here's my arrow
And here's my bow!
Criss Cross Tying Shoes
Criss Cross Tying Shoes (tune: Splish Splash I was taking a Bath)
Criss Cross and go under the bridge
Then you got to pull it tight.
Make a loop but keep a long tail
That is how to do it right
Then you take the other string
and you wrap it 'round the loop
Pull it through the hole
Now you got the scoop
Criss Cross and go under the bridge (this is where you tie the loops together) Now you made a Double Knot!
Shoe Tying Song
Tune: "Row Your Boat"
Cross the laces, make an X
Then you switch your hands
Pull them both to the sides
And then we start again
Over, under, take one lace
Below the X down low
Grab the laces, pull them out.
Now we’re set to go
Make a baby bunny ear
Pinch it way down low
Take the other lace around
This is what I know
Poke the lace under this ring
Grab it from the side
Pinch and pull both the loops
And now I know to tie.
Author: Michele Kucera, OT (Occupational Therapist)
Practice Time
Jump Rope Tying
My children have an easier time learning to tie their shoes by starting with something larger than a shoelace, which requires the use of their fingers instead of their whole hand, at a young age this is more difficult.
I sit the children down and tie a jump rope around their leg, then the learning process of tying shoes is done on a large scale. Once they have the movements down, they easily switch to a shoe lace. This can be taken in the car for practice on trips in addition to practcing at home.
Contributed by: Kelly
2 Different Colored Shoe Laces
At the ends fuse two different colored laces together forming one shoe string. Lace an old shoe with this shoe string. This gives the children a shoe to practice with two different colored strings so they can see all of the steps.
Contributed by: Priscilla
Shoe Tying Stories
Sad Rabbit
Once there was a rabbit that was very sad because his ears were so long and narrow that he stepped on them all the time. One day a fairy landed on the bunny's head. She lifted up the bunny's ears and crossed them over like an x. Then she put one ear through the bottom of the x and pulled.
Next, she made each long ear into a loop and made another x like before. She put an ear under that x and pulled again. From then on the bunny remembered how to tie his ears into a bow, and he lived happily every after.
Tepee Tying Story
A Native American made a teepee (pull lace up and cross one under the other) and it collapsed! (pull first "knot" down). So he started another, (make first loop for bow) and he took this string and went around it, (wrap other lace around loop) and went inside, (push lace under new loop) and there he had it! Two Tents! (pull loops for bow) .
This story is great for a group activity where the children can help one another follow the story, and if you make pictures to go with the story the kids can follow the steps by themselves! The story also helps to limit the child's frustration with learning to tie because they are helping the Native American to build a teepee and if they fail it is the Native American who needs more help!
A Story For Tying Shoes
My Shoelace Blues - I've tried and tried to tie you, shoe. I've never done it yet. A loop that flip-flops on the floor Is as close as I can get. I've practiced on spaghetti. I've practiced on the mop. I've practiced on my sister until she made me stop. So here's the loop again, shoe. I'll hold it with my thumb. I'll wrap the other end around... And yank it into bows. It's done!
Learning Centers
Gold Shoes
Paint an old pair of sneakers with gold spray paint and lace with bright colored laces. All the children will want to practice tying their shoes.
Directions For Tying Shoes
Tying Shoes
Need: Shoes with laces
When teaching children how to tie their shoes, split up the entire process and teach it in steps. Remember to undo and redo each step repeatedly, until it appears the child seems comfortable with it. Not only does conquering a step encourage the child, but it makes the remainder of the task seems that much smaller, and therefore less intimidating.
STEP 1:
Cross the laces, bring one lace around and through the "hole," then pull them tight.
STEP 2:
Simply add a loop to one lace at the end of Step 1.
STEP 3:
The child wraps the other lace around the loop, and then pushes the middle of that lace through the "hole" under the loop; stop as soon as the child pushes the second lace through that hole
STEP 4:
The child releases the original loop, and grabs the second, newly-created loop on the other side of the hole.
STEP 5:
The child regrasps the original loop, so that they now have a loop between each thumb and index finger, and pulls the knot tight.
STEP 6:
You explain that it's a good idea to try to make the loops and the ends of the laces about the same length.
Two hints: 1) instead of starting with shoes right away, start instead with rope, which children can handle more easily and makes thetying and structure of the knot more evident, and 2)when using shoes, tie two differently colored laces together, then lace them into the shoe: this makes it easier to refer to the lace you want the child to manipulate.
Contributed By: Adam Carpenter
Directions for those who have trouble tying shoes the regular way.
Have the child make an X, put one end of the shoestring through the X and pull tight. Most children do not have a problem with this. Then make two long bunny ears, make an X with them, put one through the bottom part of the X and pull tight.
Shoe Tying Incentives
Make a big deal when a child learns how to tie their shoes. As an incentive, give them a new pair of laces.
Have a designated person to tie shoes. The children who can tie shoes gets to practice more and the teachers don't have to tie them all the time.
Ask 3 before me rule - Before asking the teacher for help ask 3 others first.
Tips
Sit behind the child while tying their shoes so they can see from their view how it is done.
Use different colored shoe laces in a child's shoes.
Story

Pete the Cat: I Love My White Shoes
by James Dean (Illustrator), Eric Litwin (Author)
Pete the Cat: I Love My White Shoes
by James Dean (Illustrator), Eric Litwin (Author)
Pete the Cat goes walking down the street wearing his brand-new white shoes. Along the way, his shoes change from white to red to blue to brown to WET as he steps in piles of strawberries, blueberries, and other big messes!
But no matter what color his shoes are, Pete keeps movin' and groovin' and singing his song...because it's all good. Pete the Cat: I Love My White Shoes asks the reader questions about the colors of different foods and objects—children love to interact with the story.
Video
Shoes
Fingerplays/Songs
Magic Shoes
If I had magic shoes
Do you know what I'd do?
I'd skate all over town
and then come back to you.
If I had magic shoes
Do you know what I'd do?
I'd walk right up the wall
and then come back to you.
If I had magic shoes
Do you know what I'd do?
I'd run around the world
and then come back to you.
Art
Design Your Own Sneakers
Place an old pair of shoes on paper. Trace around the shoes. Take the shoes off the paper. On the paper design your own shoe, any way you want. Include shoe laces or invent a new way to close your shoes.
Shoe String Painting
Have the children use shoe strings to paint a picture.
Socks
![]() Centers
Centers
Shoe Store
Add the following to create a shoe store: play money, shoe brushes, shoe horns, chairs, old shoes, shoe laces with shoe for lacing and tying, cash register, receipt book, work bench, old sewing machine, little tools, little nails, aprons, saddle soap, pencils, foot measurer, shelves, shoe boxes.
House Corner
Place a number of adult size shoes in the house corner. Be sure to provide shoes with buttons, zippers and ties to practice skills.
Science/Math
Graph shoes according to characteristics.
With the children count all the shoes or feet in your group. Introduce the word "pairs". Count the shoes/feet again, this time count by twos.
Make a pattern with the childrens' shoes. Have the children make patterns with shoes.
Centers
Wash Day
Add socks to the water table for children to "wash" and hang up to dry.
Games
Play a hide-and-seek game with a sock.
Science/Math
Sock Garden
For each child, you will need an old, large white sock and a small plastic baggie.
Ask each child to put a sock on over one shoe. Take a walk outdoors, gathering seeds, twigs, grass, and burrs on the socks.
Inside, remove the socks and examine them. Place them in individual bags, keeping them damp. Over the next few weeks, watch the sock gardens grow!
Sort
Divide socks into two piles(one pair from each sock in a different pile). Give children one sock and have the children find the matching sock from the other pile of socks.
Give each child 3 socks in a bag; one pair and one odd sock. Have the child remove the one that is "not" the same from the bag.
Set out a basket of socks and have children sort socks by color.


